[section title=”The Planning”]
[field title=”Wedding Colors”]
A romantic and chic palette inspired by the warmth of sunshine. The design featured layered yellow tones — from soft butter to pastel lemon — paired with fresh greenery and touches of white through elegant calla lilies. The combination created a sophisticated and joyful atmosphere, blending modern elegance with natural charm. The result was a luminous celebration that felt effortlessly timeless under the Cabo sun.
[/field]
[field title=”Design / Vibe / Vision”]
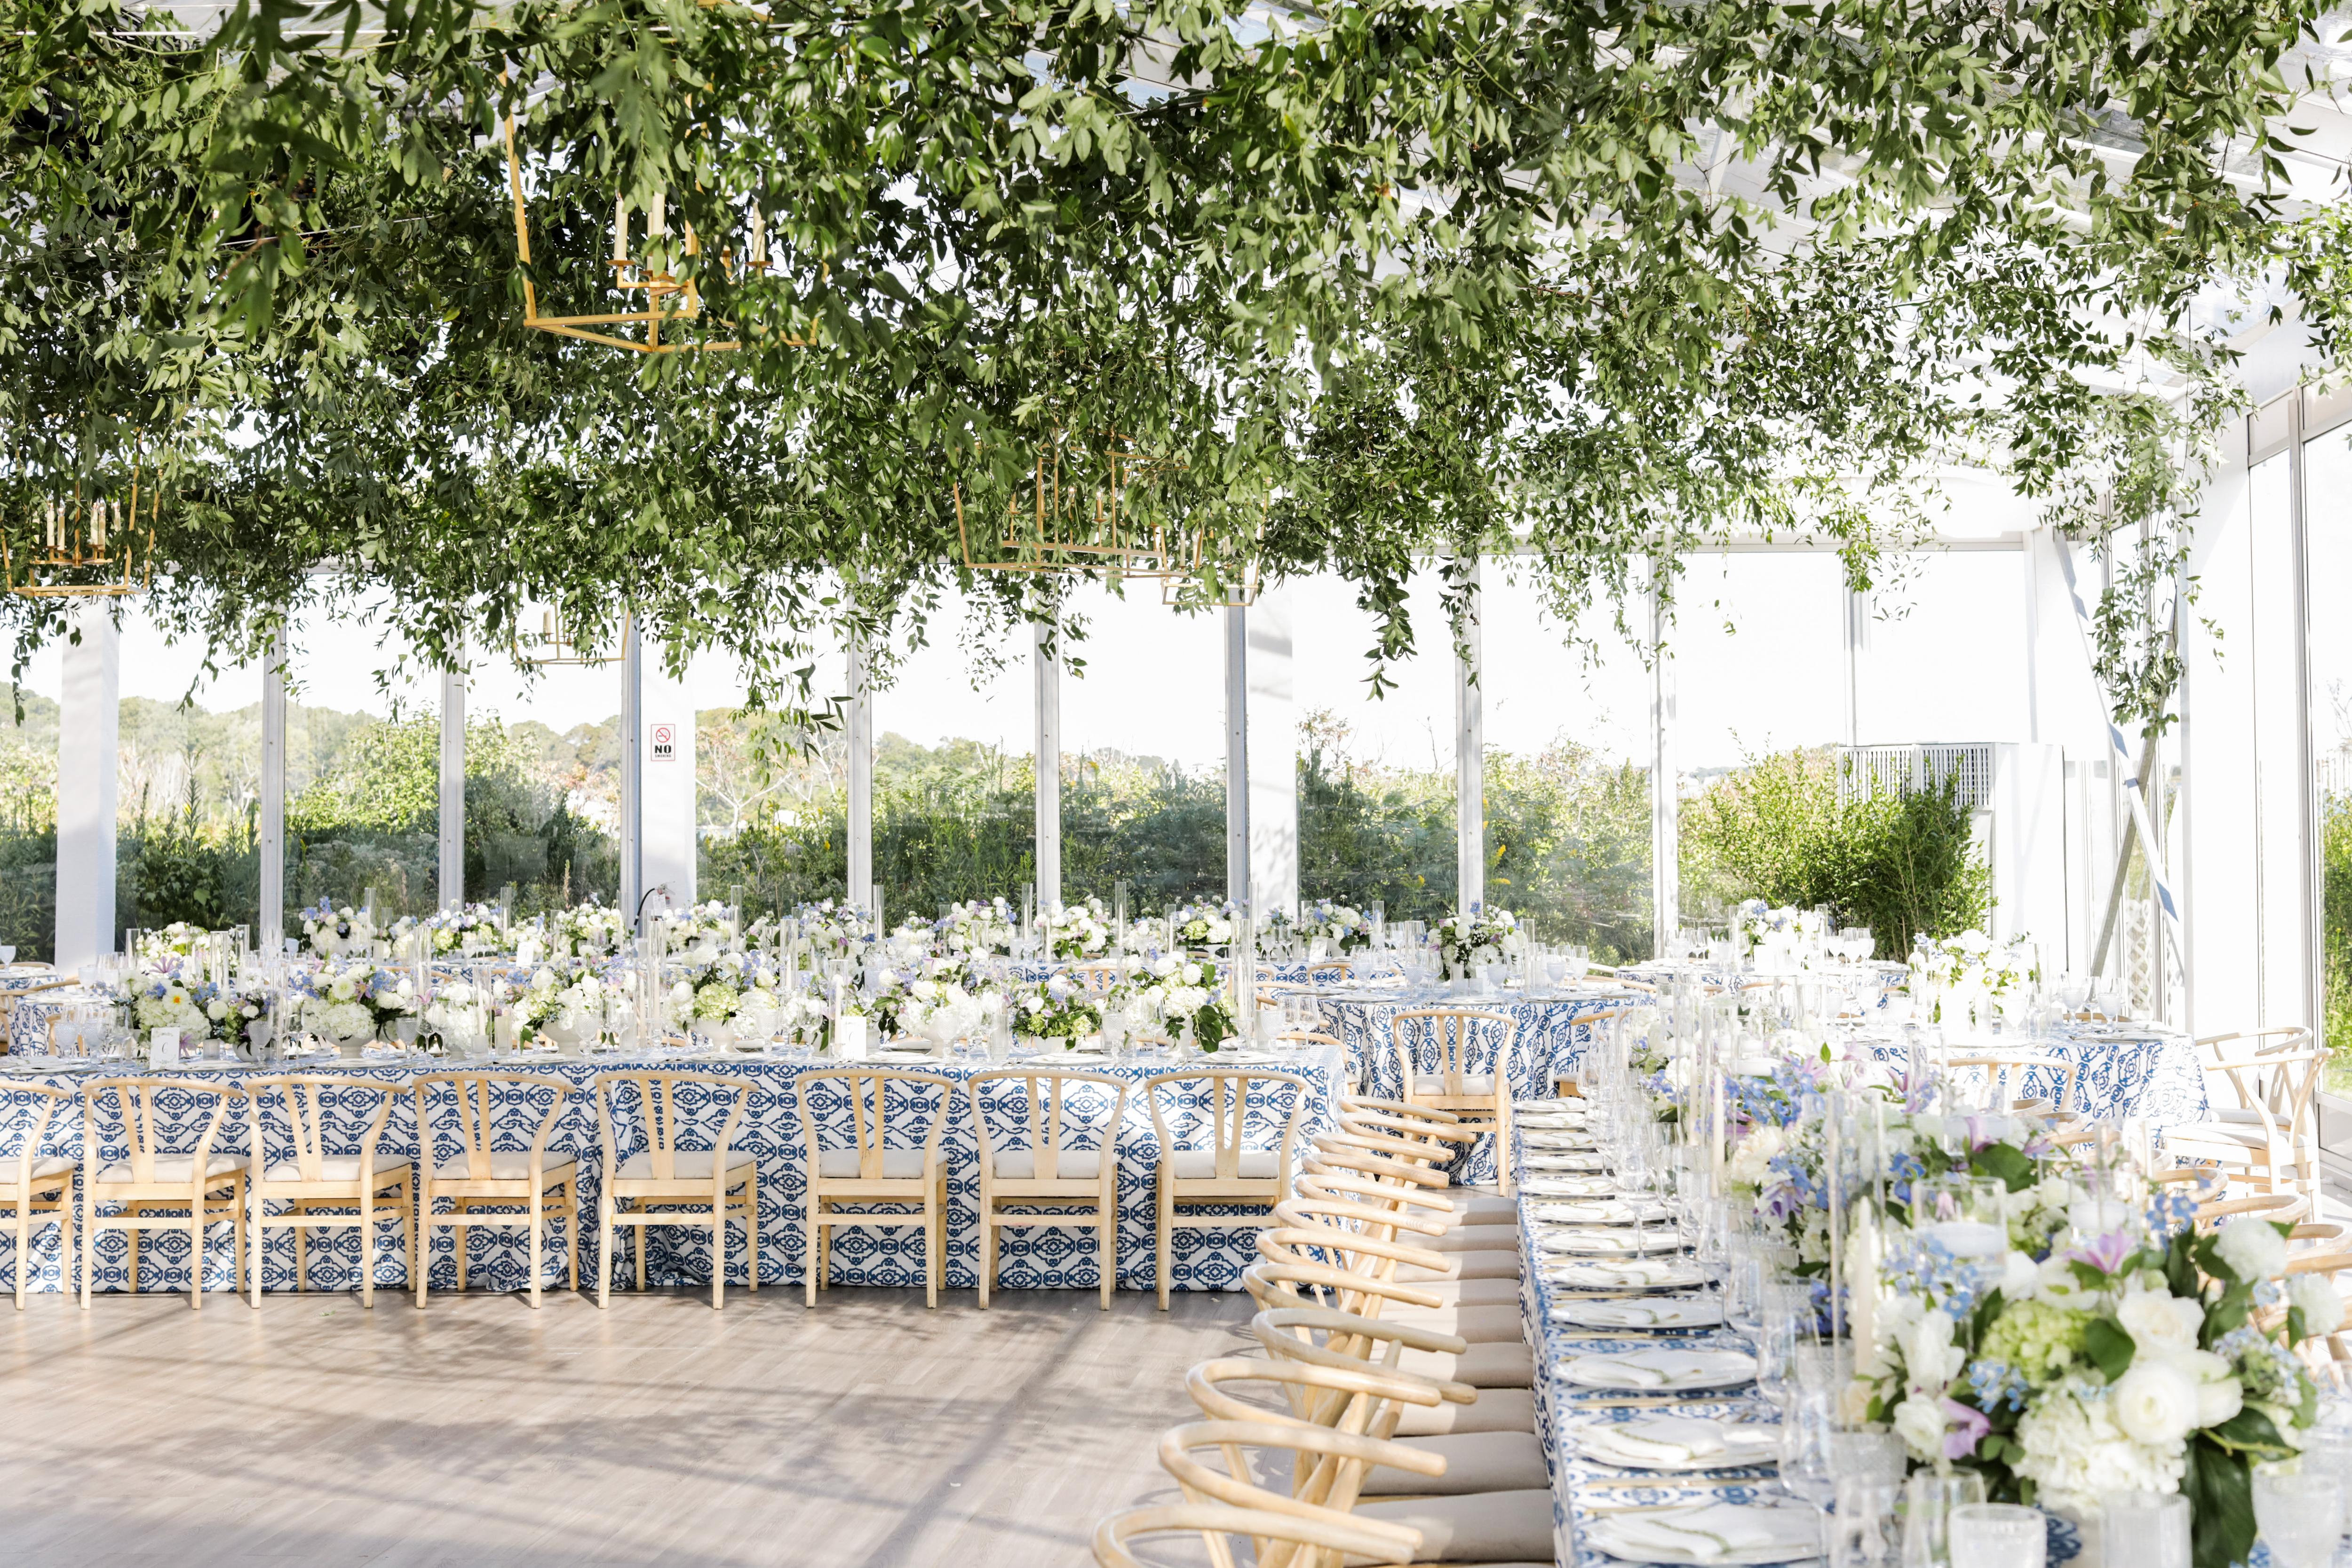
The overall design was a romantic and sophisticated collaboration between Destination Weddings Los Cabos, Cabo Flowers and Cakes (wedding design by Bibiana Santana), and the bride’s mother, Robin Johnson. The vision was to create an intimate and elegant celebration that felt timeless and refined — from the ceremony to the reception. For the ceremony, the design featured a sophisticated setup with two floral pillars framing the altar, creating a stunning yet understated focal point. Along the aisle, delicate floral arrangements were placed on the floor, adding texture and color without overpowering the natural beauty of the surroundings. The overall look was clean, romantic, and gracefully minimal, letting the florals and soft yellow palette shine. For the reception, two long rectangular tables served as head tables for the guests, complemented by a sweetheart table exclusively for the couple. Soft pastel yellow runners draped elegantly to the floor, adding a touch of understated luxury to the tablescape. The ambiance glowed with pillar candles in glass cylinders, taper candles in delicate holders, and hurricanes that cast a warm, romantic light across the space. Between the candles, clusters of yellow and white blooms added texture and freshness. Elegant details tied everything together — table numbers and menus with gold accents, and personalized place cards lovingly created by the bride herself. The result was a space that felt intimate, luminous, and beautifully balanced between romance and sophistication.
[/field]
[field title=”Proposal Story”]
Shana and Kedrian’s love story began in the most modern way — through mutual friends on social media — yet it instantly felt timeless. Both share a deep commitment to helping others through their work in the healthcare field, and their connection was built on kindness, empathy, and purpose. What started as a simple conversation quickly blossomed into a bond grounded in shared values and mutual admiration. They both come from families with African roots, and their deep respect for their culture and heritage became a meaningful thread in their relationship — a reminder of where they come from and what they hope to build together. For Kedrian, love was something he thought might never return. After a difficult past relationship, he had quietly accepted that perhaps his chance at lasting love had passed. But when he met Shana, everything changed. Her warmth, grace, and genuine spirit reminded him that love can be healing, powerful, and perfectly timed. From that moment on, they both knew — they had found the person they were meant to walk through life with.
[/field]
[/section]
[board_carousel title=”Getting Ready”]


[/board_carousel]
[board_carousel title=”Bridal Portraits”]


[/board_carousel]
[board_carousel title=”First Look”]


[/board_carousel]
[section title=”The Fashion”]
[field title=”Wedding Gown”]Shana’s wedding gown was the perfect blend of timeless elegance and modern allure. She wore a stunning satin mermaid dress that hugged her silhouette beautifully, creating a sophisticated and romantic look. The gown featured off-the-shoulder sleeves that framed her neckline with effortless grace, while delicate sheer panels along the waist and back added a subtle touch of sensuality.
The combination of soft satin and structured tailoring gave the dress an ethereal glow under the Cabo sunlight — classic yet undeniably captivating. Every detail reflected Shana’s personality: confident, graceful, and effortlessly chic.[/field]
[field title=”Bridesmaid Dresses”]
The bridesmaids looked absolutely radiant in mustard-yellow satin gowns, designed in a sleek, elegant silhouette that perfectly complemented the romantic palette of the day. Each dress featured delicate feather detailing across the bust, adding a touch of texture and high-fashion flair inspired by modern African elegance. The rich mustard hue brought warmth and sophistication, glowing beautifully under the Cabo sun. The color highlighted each bridesmaid’s natural beauty, creating a stunning visual harmony that felt both vibrant and refined. Together, their look was a perfect reflection of the wedding’s essence — joyful, elegant, and deeply connected to culture and celebration.
[/field]
[field title=”Groomsman Attire”]Kedrian looked effortlessly sophisticated in a white satin tuxedo jacket paired with classic black trousers, a black bow tie, and polished black shoes. The contrast of crisp white against deep black created a timeless and refined look — modern yet rooted in tradition.
The satin finish of the jacket caught the light beautifully, echoing the subtle sheen of the décor and Shana’s gown. It was the perfect ensemble for a groom whose style reflected confidence, grace, and understated luxury. Side by side, Shana and Kedrian embodied modern elegance — a perfect balance of warmth, romance, and timeless style.[/field]
[/section]
[board_carousel title=”Wedding Party”]


[/board_carousel]
[board_carousel title=”Ceremony”]


[/board_carousel]
[board_carousel title=”Cocktail Hour”]

[/board_carousel]
[section title=”The Details”]
[field title=”Food & Drink”]
The dinner was designed to feel warm, inviting, and full of connection — a family-style dining experience that encouraged guests to share, savor, and celebrate together. The menu was a beautiful expression of modern Mexican cuisine with a refined coastal touch, perfectly curated to reflect the couple’s love for flavor and togetherness. Guests enjoyed a trio of starters that set the tone for the evening: a classic Caesar salad with tomato marmalade, crispy garlic, and avocado dressing; a refreshing Guaca-Ceviche of sea bass, avocado, and chile serrano served with crispy tostadas; and flavorful Crispy Birria Tacos filled with stewed brisket, tomatillo salsa, and avocado mousse. The main dishes — Adobo Roasted Hen with arugula pesto and organic baby vegetables, a Pork Tomahawk with mango-habanero chutney and gingered sweet potato, and Pit-Roasted Lamb “Barbacoa” with garbanzo purée and drunken sauce — were served to share, allowing everyone to taste and enjoy each creation. A build-your-own ice cream bar brought a playful close to the meal, featuring flavors like strawberry basil, Mexican chocolate, butter pecan, and vanilla with a variety of sweet toppings and syrups. The service was exceptional — the venue ensured that every dietary restriction and allergy was handled with care, creating a seamless and joyful dining experience for every guest. The celebration also featured a five-hour open bar with a curated selection of premium spirits, wine, and beer, plus refreshing non-alcoholic options. The couple’s signature cocktail, “La Luna,” — a bright blend of Altos Silver Tequila, Aperol, lemon juice, mango purée, and soda — captured the golden warmth of the Cabo sunset. For non-drinkers, pitchers of pineapple lemonade offered a sweet and tropical alternative. To end the night on the sweetest note, Shana and Kedrian cut into a three-tier cake featuring Vanilla Bean and Lemon layers, filled with lemon buttercream, and finished with white frosting and delicate pearl details — the perfect balance of elegance and joy.
[/field]
[field title=”Florals & Decor”]The floral design was a breathtaking expression of romance and sophistication — blending vibrant yellows, soft buttery tones, delicate whites, and airy baby’s breath for texture and movement.
For the ceremony, two asymmetrical floral pillars framed the altar in a graceful half-moon composition. The arrangement on Shana’s side stood slightly lower, while the one on Kedrian’s side reached higher — symbolizing balance and unity. Along the aisle, low floral arrangements in the same palette lined the walkway, complementing the light brown cross-back chairs that added a natural, elegant warmth to the setting.
During cocktail hour, the venue’s high-top tables were styled with petite floral touches that tied seamlessly into the day’s palette. A refined seating chart and a guest book table adorned with fresh blooms welcomed guests into the evening’s celebration with timeless charm.
For the reception, the ceremony florals were thoughtfully repurposed at the sweetheart table, creating a natural focal point filled with color, depth, and texture. Two long king tables anchored the reception design, draped in pastel yellow runners that cascaded gracefully to the floor.
The tablescape was illuminated by a soft glow of candles in various heights — pillar and taper — in shades of yellow and ivory, creating a warm, romantic ambiance. Each place setting featured beige plates from the venue, layered with yellow-and-white napkins that draped elegantly between them. Gold-accented menus and table numbers added a subtle touch of luxury, while handmade place cards crafted by the bride herself gave every seat a personal, heartfelt detail.
The celebration took place by the poolside, where candlelight reflected off the shimmering water. Floating florals drifted gently across the surface, mirroring the surrounding arrangements and adding a dreamy, ethereal finish to the night — the perfect reflection of a love that glowed from within.[/field]
[field title=”Wedding Cake”]
For Shana and Kedrian, the cake was more than just dessert — it was a meaningful centerpiece that reflected their timeless elegance and shared love for life’s sweetest moments. Designed with three classic tiers, the cake featured alternating layers of Vanilla Bean and Lemon, filled with a delicate lemon buttercream that added a fresh, citrusy note perfect for the warm Baja evening. The white frosting was adorned with cascading pearl-like details, adding a soft touch of glamour, while subtle floral accents in yellow, ivory, and baby’s breath tied the design seamlessly into the day’s romantic color palette. Set upon a simple wooden table surrounded by lush greenery, the cake stood out beautifully against the backdrop of glowing candlelight and florals. The couple shared a formal cake-cutting moment, one of their favorite highlights of the night, as guests gathered around to celebrate. It marked the perfect transition from heartfelt traditions to the joyful start of the party, when the dance floor opened, and the celebration truly came alive.
[/field]
[field title=”Readings, Ceremony Music, Reception Songs”]Music played a huge part in Shana and Kedrian’s celebration — it was the heartbeat of the night. The couple wanted the soundtrack of their wedding to reflect their African roots and shared love for soulful, joyful rhythms, and finding the right DJ was essential.
After connecting with DJ Barra, their worries melted away. His flexibility, deep musical knowledge, and effortless ability to read the crowd made him the perfect fit. From the ceremony to the last dance, every beat felt intentional and full of emotion.
DJ Barra not only curated the music but also acted as MC for the evening, guiding guests through heartfelt speeches and smooth transitions. The energy was contagious — guests danced non-stop, smiles filled the dance floor, and the atmosphere was electric.
One of the most memorable moments came when Kedrian surprised Shana by singing a song just for her, a tender gesture that had everyone in tears. Later, he shared a touching dance with the bride’s mother — a moment that perfectly captured the warmth, connection, and joy that defined this unforgettable celebration.[/field]
[field title=”Special Detail #1″]
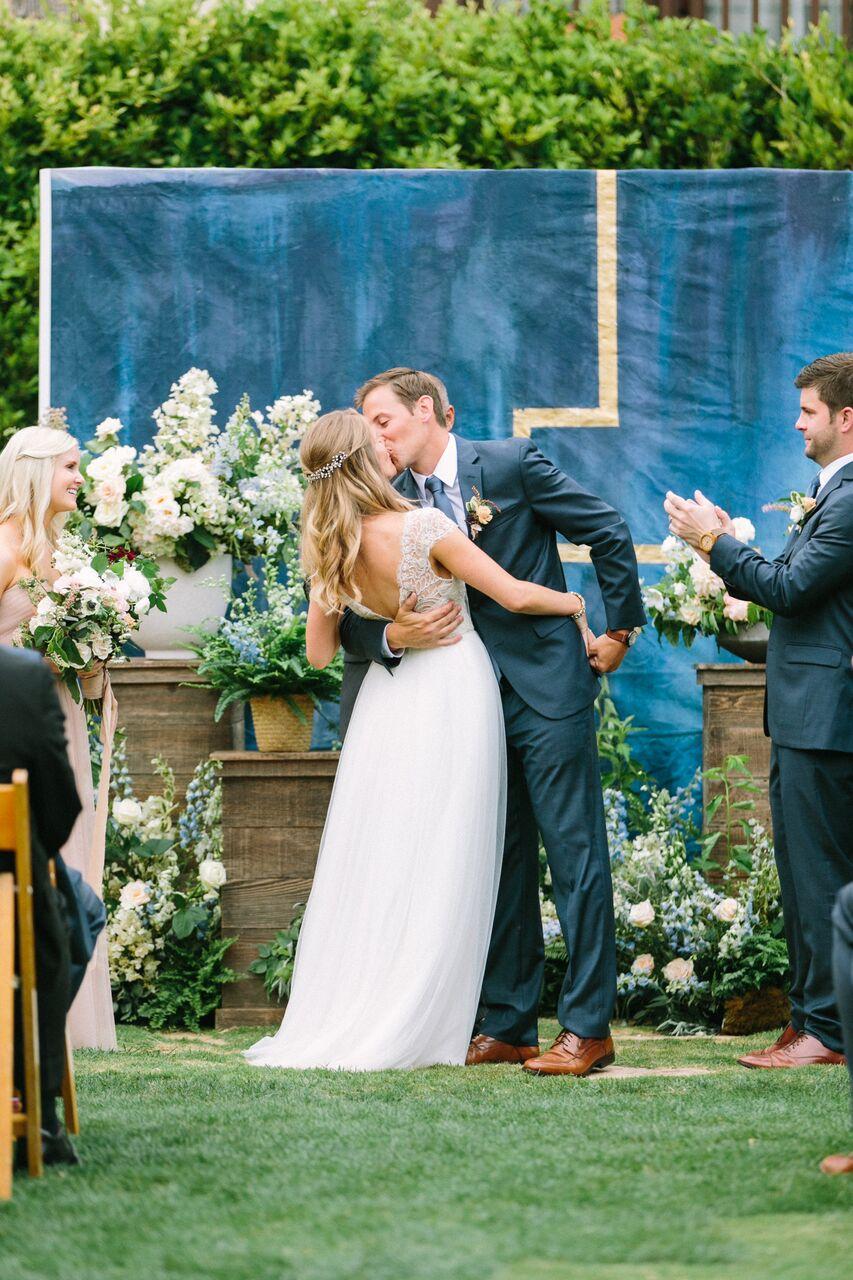
One of the most meaningful and visually striking moments of Shana & Kedrian’s celebration was the incorporation of a hand-crafted broom that honored their shared heritage and celebrated the beginning of their married life together. Rooted in West African and African-diaspora traditions, the so-called “jumping the broom” ceremony is a symbolic act that represents sweeping away the past, cleansing old chapters, and stepping into a new life together. At the ceremony, with one broom placed just behind the couple and held by the maid of honor and the groomsman, Shana and Kedrian faced the altar, turned, and jumped together over that broom — marking the moment they formally crossed the threshold into their shared future. Following the jump, they were pronounced husband and wife, sealed their union with a kiss, and made their triumphant exit together. It was a visual and emotional highlight — not just a photo-op, but a ritual deeply tied to identity, culture, and intention. The broom became a keepsake of their promise, their roots, and their joyful leap forward.
[/field]
[field title=”Special Detail #2″]Another moment that stole everyone’s hearts was Shana’s first look with her nieces. As an only sister, these three little girls hold a very special place in her life — they’re her lucky charms, her “little tribe.” Though the wedding was an adults-only affair, there was never a question about whether they’d be part of the day. Dressed in soft yellow satin dresses with delicate bows and matching braids, the girls covered their eyes as Shana approached in her gown. When they finally saw her, their excitement and awe filled the room. It was a tender, emotional moment that perfectly captured the joy and innocence of family love.[/field]
[field title=”Special Detail #3″]
Shana and Kedrian shared an intimate first look of their own, away from the guests, where they exchanged private vows and meaningful gifts. They wanted to give each other something symbolic rather than extravagant — a gesture filled with intention and connection. Shana gifted Kedrian a vintage-inspired Citizen watch, identical to one worn by his late grandfather — a deeply personal touch that honored family legacy. In return, Kedrian surprised her with a gold necklace featuring a pendant inspired by traditional African symbolism, representing strength, unity, and eternal love. It was an exchange that spoke volumes about who they are as a couple — rooted in culture, guided by faith, and grounded in love.
[/field]
[/section]
[board_carousel title=”Couple Portraits”]


[/board_carousel]
[board_carousel title=”Reception”]


[/board_carousel]
| Share this gorgeous gallery on | |
Photography: Fabi Rosas Cabo Photographer | Event Design: Bibiana Santana | Event Planning: Destination Weddins Los Cabos | Floral Design: Cabo Flowers | Stationery: Core Visual | DJ: Emmanuel Ibarra | Wedding Venue: Baja Luna | Accomodations: Hilton Los Cabos | Beauty: Wakeup and Make up by Daniella Leon | Rehearsal Dinner Venue: Hilton Los Cabos
Join The Conversation
favorite (0) share share (0) pin (0)