SUBMIT WEDDING
View Posts By:

categories


tags

 
Modern Lilac Wedding Inspiration That Was Tailor Made for Feminine Brides

The minute we saw those playful pops of lilac, that fresh color scheme and the not one but two gorgeous gowns – we fell… i mean we fell hard. Natalie Bray Studios blew us away yet again with her stunning captures, sure to inspire 2020 brides in a major way. Native Poppy created arrangements that will instantly brighten your day! Don’t miss the full gallery of images to see all the pretty this shoot has to offer, effortlessly blending modern designs with timeless style.

From Natalie Bray StudiosSoiree Beauty Concierge wanted to refocus on modern and stylish looks for the new year. Feeling fresh and timeless at the same time was a goal. A feminine bride who loves to have fun and has great style. We paired each look with a beautiful Christos Costarellos gown. 

These looks are also a simple way from going from a hair up style for the ceremony to a more playful elegant down style for reception. Each look has a beautiful way to add accessories to your hair style as well. In styling the table design I love fresh and modern take on classic designs. 

So, I chose Catalog Ateleir because of this very aesthetic. Their rental offerings have modern shapes with classic forms. They are stunning. Native Poppy did a wonderful job per with her floral designs. With pops of lilac and soft green to ground the colors, we also choose soft green table candles to balance the look. Shasta bell provided the invite and paper goods, which gave everything a feeling of old world and tied the subtle gold details throughout.

Photographer: Natalie Bray Studios | Floral Design: Native Poppy | Hair and Make-up: Soiree Beauty Concierge | Rentals: Catalog Atelier | Ring box: The Mrs Box | Studio : Natalie Bray Studios | accessories : Design and created by Christina Sfez | boutique: The Dress Theory | candles : Creative Candles | co-photographer : Ariel Min Photography | dresses: Christos Costarellos | film lab: The Find Lab | model : @brittanymartinez25 | paper goods: Shasta Bell Calligraphy | styling board: Heirloom Bindery

These Vendors are members of our Little Black Book.
For membership information, click here
This Whimsical Texas Wedding Gives Us All The Feels

This Texas wedding rivals the beauty of a sunrise. We can’t help but be reminded of the loveliest time of the day as we swoon over the blush, amber, and neutral accented color palette. Lucas and Elizabeth’s wedding was full of whimsy and romance. Guests were delighted at every turn, from an outdoor ceremony featuring trees dripping with ethereal blooms to a dance floor decorated with an equally awe-inspiring balloon installation. Wild Sky Events artfully brought the couple’s fall celebration to life and Chassie of Crown of Glory Beauty matched Elizabeth’s glowing bridal look with the autumnal wedding palette. Enjoy all the fun details in the full gallery.


From Wild Sky EventsThe couple wanted a wedding that felt modern, architectural, textured but also romantic. The design for this wedding was all about structure mixed with whimsy and romance. We wanted all the elements to feel purposeful and have a refined shape but not feel too modern and over-styled.


For the ceremony, Clementine Botanical Arts designed a beautiful floral installation with foraged branches, lush large blooms with an elegant line. As for the ceremony aisle, we kept it very simple with two lush arrangements and custom made thirty feet woven rug.


For the reception, we wanted to create the look of a vintage botanical greenhouse. We installed greenery on every possible surface to help create that look! For the tablescape, we focused on texture and color. Oatmeal velvet linens, paired with amber linen napkins and ceramic china complimented the lovely blush, amber, and neutral floral color palette. It came together like a dream!


Photography: Caroline Lima Photography | Cinematography: Marissa Licarione | Design: Wild Sky Events | Event Planning: Wild Sky Events | Floral Design: Clementine Botanical Art | Stationery: Fine Day Press | Reception: Matties | Hair + Makeup: Crown of Glory Beauty | Lighting: Ilios | Venue: Matties | Balloons: Botanical No. 9 | Rentals: BBJ La Tavola | Rentals: Premiere Events | Rentals: Birch And Brass Rentals

Ask The Editor: Jeans, Playrooms, Budgeting and Bookshelves With Lots of Books

We’re back with our second week of “Ask the Editor!”

Confession — last week’s article was long. Like REAL long. But we couldn’t contain ourselves! We were just TOO excited to narrow it down, but this week we’re only doing 4 questions so it’s quite a bit more digestible.

1.From @katewalthall: “Playrooms for kids 10 years apart. How to please both!”

Firstly, this article is a GREAT resource to answer this question! Since there are two different age groups present, this room needs to serve two different purposes. This article walks through how @palmbeachlately converted her home office from solely and office to an office + playroom. Your youngest will want a place to play, while your oldest might benefit from having a place to do homework, so this balance can work to your favor!

2. From @cassiwatkins: “Can someone explain to me new stylish jean styles? I’ve had skinny jeans for a decade”

This is a fun one! Jeans are an ever-evolving style, totally all-American and have worked their way into being a wardrobe staple.

Jeans started out pretty stiff and utilitarian. They were created to get a job done and worn by predominantly men who worked in hard jobs that needed hard material to last.

In the 50’s we see jeans start to tighten up a bit and represent a new style — just watch Grease and you’ll see jeans move into a whole new demographic.

The ’70s is where we first see the first major style shift — bellbottoms— which cascaded into blouse tends, chunky shoes and a slew of other new trends.

Jeans straighten out a bit more again in the ’80s. They go back to their utilitarian nature here and are less of a style statement with ALL of the other style statements that came in the ’80s.

The ’90s is where you first see the “Mom jean” emerge. They have a high waist, loose fit and are frequently cuffed at the bottom to expose a cute little ked shoe or tasteful loafer. Boot-cut was introduced as the less abrasive cousin to the bellbottom and as a whole, we see jeans re-emerge as a style statement.

Then the 2000’s hit and we see a new style that targeted the top of the jean as opposed to the leg, the super low-cut cut jean (thank you, Brittany Spears.) This change is almost in direct opposition to the high-waisted “mom jean.”

Skinny jeans joined the main-stream circuit around 2010, but still with a low cut top. And with the skinny jean came the jegging.

But what happened with the 2010 low-cut skinny jean is that people realized they wanted to prioritize fit over fashion. What looks best for you is what FITS best for you. So after the skinny jean ran it’s course, people realized they had a choice beyond what was “current.”

We see this today! People are choosing from a myriad of fits that work best for their body type. The fitting on the leg is becoming a little less elastic, cropped flares are introduced to accentuate pretty ankles, high-waisted is coming back in the MOST flattering way, and the straight-line cigarette jean that is universally well-received is currently taking the lead.

We needed to back up all the way to the earliest style choice in jeans to illustrate that people now have options for the type of jeans they want to wear, and they now feel like they have the power to choose.

So, to answer your question, if you like skinny jeans and feel confident in them, then you’re in style! Welcome to the new decade where the fit is best and style is in the fit.

3. From @justsimplyyuu: “How to control spending when we are saving for a vacation. How to be more disciplined.”

The hardest part of budgeting is committing to starting. There are so many different methods, tricks and tips out there, so here are a few of our favorites!

– Use Cash: When you pay with cash you have a better grip and understanding of the transaction that just went through. Paying in a tangible way is scientifically proven to help you spend less money. When you swipe with a card, you’re a lot more likely to spend more than you intended. When you’re saving up for a vacation, it’s the little expenses that can accidentally take away from your larger fund!

– The $5 dollar trick: This trick work’s in tandem with using cash. Every time you get a $5 dollar bill, stash it! It’s a small enough amount not to hurt you too much, but it adds up fast! This stash can now be used on your vacation.

– Assigning EVERY dollar that you receive and spend: the saying is “tell your money where to go instead of wondering where it went.” The idea is that putting an assignment to every dollar spent means that you don’t let unknown dollars slip away. Create a dollar amount for eating out, getting groceries, clothes, getting gas — you name it! Knowing where you’re spending your money really helps you to save up for that vacation.

The discipline is hard but SO worth it when you’re on that vacay!

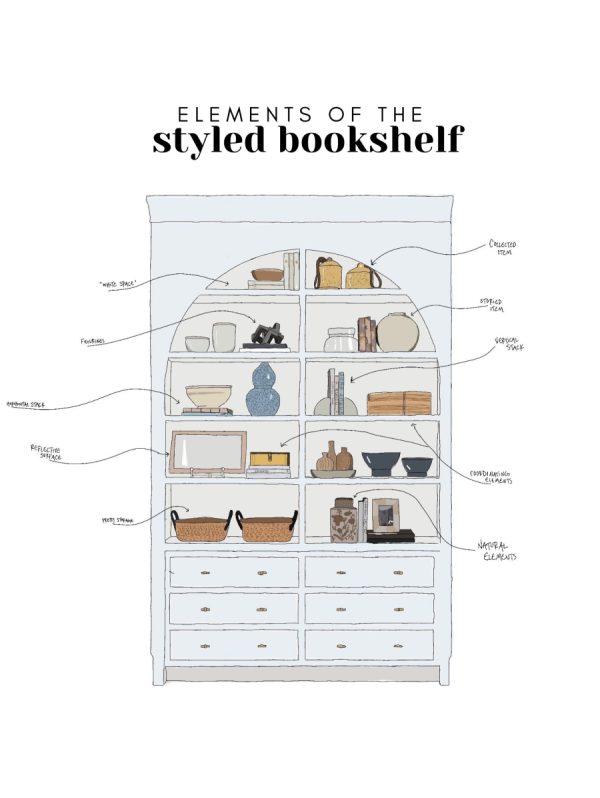
4. From @megansmooney: “shelves that are also used for lots of books”

One of the biggest questions that came from this week’s Home 101 as was how to decorate bookshelves WITH books. Which made us laugh because yes, that is the primary function of a bookcase but sometimes you get so carried away with decorating that you can forget the original purpose!

When you’ve got a bookcase that has a lot of books but you still want it to look good, you’ve got options. First off, you’ve got a full bookshelf which is great! That means you have a lot to work with. The way you organize the books will make the biggest impact with what you have! You can stack by color, genre, size or even alphabetical authors. That being said, try to choose a method that doesn’t require you to go on a scavenger hunt to locate books from the same series. You don’t want to separate your Harry Potters. Here are a few tips and tricks to make those stacks look styled, neat, and organized.

1. The best aesthetic way to organize your books is by height. Whether you keep everything all the same height, or you organize by descending height, creating this kind of unity helps to bring a little order to book chaos.

2. Candles, figurines or other smaller trinkets are always at home on a shelf and help to break up all of the books

3. Horizontally stacking your books helps to break things up a bit, but logically it also helps to get those REALLY large books to fit on the shelf :)

4. Isolated stacks are another great way to break things up and not make the shelf look too too crowded. You can prop them up against other books, or use bookends.

5. Add in greenery! You seriously can never go wrong with adding in some greenery. Ever. Like ever. And expect to hear that from us quite a bit.


That’s all for now! Tune in this Sunday to submit your next round!

These Vendors are members of our Little Black Book.
For membership information, click here
Pampas Grass, Gilded Details and a Geode Cake! This Thailand Wedding Is a Must-See!

From the bride’s bouquet to the wow-worthy ceremony arbor by IAMFLOWER, pops of pampas grass and gilded details created the most breathtaking decor at today’s seaside Thailand wedding planned by Wedding Boutique Phuket. Lucky for us, daringimages was there to capture every detail, including a jaw-dropping geode cake that looks almost too pretty to eat! Get your pinning fingers ready and see it all at the full gallery of inspiration.

From darinimagesIn the wedding business, as well as in all the other parts of the creative industry, we have waited for the minimalism to come back so long! After (too) many years of wedding shows with the distorted concept that luxury means abundance of flowers, decorations and so… we are now finally looking to a different idea of elegance, in a minimalist direction. Minimalism is the new luxury!

Look at this gorgeous wedding, outlined by nude colors, simple shapes, natural materials, dried flowers, gold painted leaves and a mixture of modern details combined with antiques. One of the most talented destination photographers, darinimages, captured this elegant nude & dusty blue wedding, designed by the innovative Italian wedding planner of Wedding Boutique Phuket and expertly decorated by IAMFLOWER at the Naka Resort Phuket, Thailand. 

“We really wanted to create something new, sophisticated and memorable with this wedding. Right at the end of the Phuket wedding season, in April 2019, it was the perfect moment to express ourselves with new ideas and trends for the new year to come.” We created an asymmetric “dried but not forgotten” altar using ivory roses, phalaenopsis orchids, pampas grass and brass painted dried eucalyptus and palm leaves. 

Luxury hanging chandeliers to light up the blush fabric draping under the big clear marquee tent right by the ocean. A sophisticated table escape in nude colors with hints of rose gold and brass decor and gorgeous tall modern centerpieces. The natural beauty of this Chinese bride grown up in Paris and the elegance of the groom from Hong Kong have been perfectly exalted by the wedding setup and decor. 

This unforgettable wedding day with around 100 guests from all over the world ended with a stunning wedding cake and a “Happily Ever After” magical 1st dance surrounded by hundreds of sparklers.

[iframe http://player.vimeo.com/video/356817447 600 338]

Photography: Darin Limsuansub | Cinematography: Tichakorn | Wedding planner: Wedding Boutique Phuket | Florals: IAMFLOWER | Wedding Cake: Passion | Ceremony Venue: The Naka Phuket | Rings: Cartier | Entertainment: Photobooth By Me Props | Bridal Gown: Nicole Spose | Bridal Shoes: Jimmy Choo | Calligraphy, Invitations: test | Entertainment, DJ :: BEN JAY DJ | Hair+ Make up: Lisa Allen

Don’t Miss The Breathtaking Views At This Deer Valley Wedding

Deer Valley might make you think of winter, but this beautiful wedding amidst the mountains will convince you not to sleep on their summer months. The bride and groom chose the Stein Lodge in Park City as their venue without hesitation as it has always been their “happy place” regardless of the season. Located in the heart of the mountains it’s easy to see why. With the help of Jacin Fitzgerald, the couple filled the ski lodge with earth tones and shades of blue that complemented the mountain setting perfectly. Tec Pataja exquisitely captured the essence of the day, see it now in the full gallery.


From the bride… We spent the day of the wedding at my family’s home in Deer Valley, where all of my bridesmaids and I had been staying. My mom gave me a compilation of letters to open during momentous occasions in life – I will treasure the letters and look forward to opening more. Paul and I exchanged heartfelt letters and gifts prior to our first look.


Our ceremony was held in a very special spot overlooking the mountains. We wanted to make sure the decor didn’t take away from the beauty of the surroundings. Beautiful white florals and a light blue aisle runner were the perfect touch.


The reception decor was stunning and when we first saw it we were speechless. Everything about it was perfect, from the antler chandeliers to the gorgeous flowers, to the velvet linens, to the beautiful cake. It was exactly what I had hoped for!


One of our favorite moments of the night was watching everyone walk into the reception as the room was revealed. The room was stunning and it made us so happy seeing everyone else love it as much as we did!


Photography: Tec Petaja | Videographer : Gruen Weddings | Wedding Planner: Jacin Fitzgerald Events | Floral Design: Jacin Fitzgerald Events | Stationary: Southern Fried Paper | Band: The party craters band | Venue: Stein Lodge | Chairs + Chandeliers: Diamond Rental Events | Crest, save the date, invites: Karla Lim (Written Word) | Custom aisle runner + altar stage, rentals: Alpine Event Co. | HMU: Bella Cosa Beauty | Linens: Latavola Linen | Lodge: Stein Lodge | Strings: We are string love | Tabletop Rentals: Borrowed Blu

These Vendors are members of our Little Black Book.
For membership information, click here
Trend Report: Blue and White


We need to open this trend report with this caveat — blue and white decor is NOT new, it’s re-emerging.

Even the Pantone color of the year is classic blue! And when they name their color of a year, you start to notice it EVERYWHERE. So it simply wouldn’t be fitting to not acknowledge this dominant color combo.


This color combination is about as classic as it gets, so we are SO in love with the fact that we’re seeing it come across our feed and hashtags.

It’s not necessarily that it went away, it’s more that all-white came in reallly strong over the past few years. And now we’re deviating from rooms with just a smidge of color, to committing to color dominant rooms that really make an impact. And now that people are starting to spread their colorful wings a little bit more confidently — we’re seeing blue as a strong leader.


Blue makes sense as a great color to commit to because it’s is a few short steps away from a neutral. “Navy is the new black” has been said so many times that it’s no longer the new black, it’s just s short tonal difference away from being black.

Blue as a color is extremely calming because it symbolizes feelings like confidence, wisdom, honesty, trust. Light blues symbolize health, healing, calmness and “softness.” So using these colors in your home is both a little confident, but in a calming way and that’s a pretty hard balance to accomplish. Then when you bring in white, it’s a blissful marriage of neutrality.

The other great thing about this color combination is that it’s pretty much appropriate in every room in the house.

– A French Country kitchen optimizes the blue and white color combination.

– Livings rooms with a blue velvet sofa is about as chic as it gets.

– Dining rooms with chinoiserie plates on display is as classic as it comes.

– Blue and white bedrooms are just dreamy.

– Kid’s rooms with adorable blue and white striped wallpaper is technically working its way into being a gender-neutral option.

– And in a bathroom, it looks real clean, and real nice.

– Mudrooms and laundry rooms get a little pep in their step when covered in this cheery color combination.

– But nothing beats a white home with blue shutters. Takes the cake every time.

So what do you think — ready to embrace this dynamic color duo? Or, have you already adopted it?

This California Vineyard Wedding Is Proof That Less Is More

We’re pretty sure this vineyard wedding is everything a bride could ever wish for. It’s filled with understated elegance, swoon-worthy details, and all set against the awe-inspiring beauty of California. Katie and Morgan exchanged vows in a touching ceremony underneath a towering oak tree on top of a hill. Following the ceremony, guests dined at farm tables set in the great outdoors with 50 acres of meadows and vineyards as the backdrop. Callista & Co. beautifully brought the couple’s dreams to life and made sure the entire event went off without a hitch. We can’t stop staring at all the details in the full gallery.


From the bride… Staying local to the town we fell in love in was really important to us. We are proud San Luis Obispo graduates and feel so lucky to have lived in a town with so much to offer. From great local food to incredible wine (the best in California), and beautiful scenery.


We wanted the palette to reflect the natural central California landscape in the summer. From the florals, to the paper stock, we wanted everything to feel refined but comfortable. It was basically a color palette of whites, off whites, sands… And to Morgan’s surprise, yes these are all different colors.


As a part-time florist of over five years, flowers were by far my biggest focus for the wedding. We fell in love with the effortless style of Emblem Flowers, but specifically the minimalist sophistication of her ikebana style arrangements. They were especially lovely for our family-style tables because their form made them easy for guests to talk through and not become a wall of florals blocking their view. Their intentional asymmetry and sparseness was a really great lesson in how less can truly be more beautiful.


We chose Callista & Co. as our wedding planner because she had absolutely phenomenal taste and could tell that through and through she was a kind person. At the end of the day, those two traits shown more than anything any other planner could’ve brought to the team. We are so thankful to have met so many talented husband and wife creative teams who helped us put our big day. It was inspiring to be invested within such a community of talented, kind-hearted, and truly hard-working people.


Photography: ANDREW AND ADA | Wedding Dress: And Something Blue | Cake: Autumn Cake Design | Stationery: Katie Witkop Design | Catering: Mistura | Hair and Makeup: Bluebird Salon | DJ: Kramer Events | Band: Nicole Stromsoe | Transportation: Elegant Image Limousines | Wedding Venue: HammerSky Vineyards | Bartending: Bottles & Ice | Emblem Flowers: Emblem Floral Design Studio | Linen: BBJ La Tavola | Planning & Design: Callista & Company | Rentals: All About Events | Rentals: Elan Event Rentals

How to Personalize Your Wedding Ceremony for a Walk to Remember

Although there is nothing inherently unique about a wedding ceremony, you can absolutely personalize it so that it feels more representative of your relationship your love for each other. Whether you choose to do just one or many of the suggestions below, you’ll be well equipped to personalize your wedding ceremony so that it feels more special to the two of you!

1. Write Your Own Vows

The easiest way to personalize your wedding ceremony comes in the form of writing your own vows. These vows can be lengthy or short and sweet, especially if you don’t love public speaking. As a wedding photographer, I notice that ceremonies with personalized vows garner the most reactions from guests (i.e. laughs, tears, etc.) and the couple when hearing their spouse read their own vows.

2. Create Your Own “Unity” Ritual

Unless candles or sand have a special meaning to you, skip them when it comes to a unity ritual. Instead, do something totally unique and unheard of. Are you both surgeons? Stitch a heart or meaningful shape on a beautiful cloth together. Are you both runners who look forward to your first child? Lace up a pair of baby shoes together. Anything you can think of, no matter how peculiar, that symbolizes your relationship would be a beautiful and unique unity activity for your ceremony.

3. Skip Overused Readings

I’m honestly surprised I’ve yet to memorize the entire “love is patient, love is kind” passage considering I’ve heard it at over 60 weddings in my career. Readings like that, while beautiful, are done over and over again, so unless it has a particularly meaningful history for you, I would skip it. If you’d like to have a family member perform a reading, have them choose a passage from a book, movie, song, or anything else that truly feels special to the two of you.

4. Rethink Your Seating Layout

The most common ceremony layout includes two sides of seating in tidy rows with some sort of arch/altar at the front. It’s not often that ceremonies deviate from this, so it’s really easy to personalize your ceremony simply by opting for a nontraditional layout such as a circle or perhaps more of a winding path through the chairs.

5. Think Outside the Box for Your “Arch”

Truth be told, it’s really hard to come up with anything unseen or totally new in the wedding world. When it comes to a ceremony “arch” you’ll have to get your creative juices (or your designer’s) flowing to create something truly personalized. For this wedding below, the couple wanted their wedding to feel homey, so their planner Amorology and Backup Backdrops designed a wood-framed house for their “arch.”

6. Make it “You”

Ultimately, feel free to disregard tradition when it comes to your ceremony. It’s your ceremony so create it exactly as you’d like! As long as you fulfill the legal requirements for the ceremony, the sky is the limit for its design, readings, and rituals. Whether you opt for a ritual that’s literally never before been done or something that is simply uncommon, infusing your own personalities and history into your ceremony will ensure that it is completely authentic!

[iframe http://www.youtube.com/embed/_-YicjA1-aE 600 338]

These Vendors are members of our Little Black Book.
For membership information, click here
Event Planning
Amorology View Portfolio
It’s No Wonder Why so Many A-List Celebs Have Tied the Knot at This Timeless California Venue!

The old world architecture of Sunstone Winery, an elegant strapless Newhite Bridal gown and a chic monochromatic beige color scheme – this my friends is the perfect recipe for a timeless wedding. Just ask A-list celebs like Lauren Conrad and Anna Camp who also tied the knot at this dreamy Santa Ynez villa… we’re sure they would agree ;) Amanda Marie Co. designed the most beautiful styled shoot ever that perfectly compliments the natural beauty of the venue, while Anne Le Pley Taylor created heavenly arrangements filled with creamy hues and lush blooms. So, if you’re looking for some gorgeous photos to inspire your classic fête – Heather Payne has got you covered at the full gallery!

From Amanda Marie Co…. The Sunstone Villa has become one of the most sought after destinations in California. For those planning their wedding, the Villa’s stunning architecture and creme-y stone, provides both the inspiration and the location for not only the most spectacular, but the most meaningful weddings. 

There is something captivating about this property that attracts both celebrity cliental (Lauren Conrad, Anna Camp and most recently Tom Welling) and the local brides looking for an intimate celebration. To mark Sunstone’s 25 Anniversary (one of the oldest vineyards in the Santa Barbara County), I wanted to showcase the approachable style and classic elegance that have attracted so many to the estate. 

A monochromatic color scheme of neutral beiges were chosen to complement instead of pulling attention away from the spectacular architectural elements of the building. The lasting style of black with writing in gold was featured on the paper goods. 

Stunningly elegant square-back velvet chairs by Theoni were chosen as a nod to traditional French style. Tabletop elements of creme-y plates and brushed gold flatware from Borrowed BLU were chosen.

The bride wore a classic gown in a tailored shape hand crafted by LA based, Newhite Bridal. The groom, in a black on black suit.

[iframe https://player.vimeo.com/video/378871684 600 338]

Photography: Heather Payne | Videography: Velvet Sky Films | Florals: Anna Le Pley Taylor | Stationery: Written Word Calligraphy | Bride's Shoes: Jimmy Choo | Catering: The Lucky Hen Larder | Hair & Makeup: Janet Villa | Venue: Sunstone Winery & Villa | Bridal Accessories: Elie Saab | Creative Direction, Planning & Design: Amanda Marie & Co. | Fashion Styling: Heather Payne | Gowns: The NeWhite | Groom Attire: Mission Tuxedos | Linen: BBJ La Tavola | Models: Ted Carlson | Rentals: Theoni Collection | Tabletop Rentals: borrowed BLU

These Vendors are members of our Little Black Book.
For membership information, click here
This International Wedding Lavishly Hosted Over 300 Guests

Pack your bags for Cyprus for this black-tie international affair. Loutsiana and Panayiotis met while away on holiday and continued their love story through a long-distance relationship. A 20-hour flight from Melbourne to Cyprus couldn’t stop Panayiotis from visiting Loutsiana over 20 times! When it came to wedding planning, the couple had a clear vision in mind. They set out looking for a venue that could host both a ceremony and reception, and also accommodate over 300 guests coming in from all over the world! Just take one look at the Anassa Resort, which showcases Mediterranean living at its finest, and you’ll see why it was the perfect fit. Sotiris Tsakanikas superbly captured the beauty of the location and love the couple shares, see all of the sublime details in the full gallery.


From Splendid EventsIt was pretty clear the place had to be no other than Anassa Resort. The palm-fringed, Mediterranean designer den, comes with immaculate views over the secluded bays of Akamas Peninsula that meet elegant, marbled interiors, exclusive designer boutiques, restaurants and pools, fragrant gardens, private villas and of course a gorgeous beachfront.


The couple’s vision for the Big Day was timeless elegance meets a warm ambiance, and -literally- tons of orchids. The church and churchyard were festooned with endless rows of white orchids, white hydrangeas for volume, white spray, and David Austin buds.


We set the scene for the reception right in front of the couple’s church of Saint Athanasia, the saint-protector whose name Panayiotis’ grandmother shares. According to the groom’s family, it would be a nod and a lovely tribute to her memory. The terrace was festooned with strings of lights and a sea of candles on the tables, while long family-style dinner ensued honoring every Greek-Cypriot tradition and ritual.


Photography: Sotiris Tsakanikas | Event Planning: Splendid Events | Floral Design: Splendid Events | Wedding Dress: Steven Khalil | Invitations: Letterpressed | Reception Venue: Anassa Hotel | Groom's Attire: Tom Ford | Bridal Shoes: Christian Louboutin | Rentals: Party City

These Vendors are members of our Little Black Book.
For membership information, click here
Ice Age Inspired Birthday Party

We love seeing a truly creative birthday party theme — and this Ice Age themed party is so COOL (pun slightly intended). One of the best ways to find a theme for a kid’s birthday party is to elaborate on what your child is particularly into that year, and this party does just that! Take a look!

From the planner, 50 by 50 Event Design: La Brea Tar Pits Inspired Birthday Party

What do you do when your daughter’s favorite place to go is the La Brea Tar Pits and requests a Tar Pit themed birthday party?!

I wanted to evoke the feeling of being in a museum that transports you directly to the Ice Age.

It all began with an invitation diorama beautifully drawn by Zachary Baldus and the quote “It all began with a single snowflake.” We included her favorite Ice Age animals… Sabertooth, wooly mammoths, Dire wolf and ground sloth.

We had an excavation station where you could dig for crystals and a “Tar Pit” ball pit. Art Camp LA did such a beautiful job with the crafts, the children got to create their own Ice Age terrariums. We used lots of white ferns, since they look not only like skeletons but also they are an ancient plant.

Dawn with Earthbaby Flowers created centerpieces that felt like they were growing right out of the ground… Natural and whimsical. In terms of colors I still wanted to keep it soft and natural, reminiscent of the colors that nature creates in the snow… Not just white, but dusty blues and soft pinks.

The dessert display was definitely an ode to a museum display showcasing the fossils of all the animals from the Ice Age. The desserts were so meticulously and beautifully created by Rachel of Elisecakes…@up_up_intheair created an amazing balloon ceiling eluding to falling snow… And I also created tassels white fringe to carry on the idea of constant snow.

We gifted our daughter Eames her very own “Dire Wolf” (German Shepard) named Lucy. To close the party we made it snow here in sunny Los Angeles, which the children absolutely loved.


Photography: Billye Donya Photography | Florals: Earth Baby Flowers | Acrylic Signage: Creative Amme | Backdrops: 50 by 50 Event Design | Balloons: Up Up In The Air | Concept & Design: 50 by 50 Event Design | Craft Station: Art Camp LA | Desserts: Elise Cakes | Invitation Artist: Zachary Baldus | Invitation Design: 50 by 50 Event Design | Photo Booth: Brass Street Booth | Rentals: Teak & Lace

These Vendors are members of our Little Black Book.
For membership information, click here
Ombré Meringue that Makes for the Cutest Valentine Gift

Sometimes an image crosses my path that stops me dead in my tracks and often times it involves dessert. I have a weakness and this meringue is totally catering to it. As party of our Valentine’s Day Party Extravaganza, we cooked up some gorgeous treats infused with blush tones and perfect for nibbling or gifting. Looking for even more Valentine’s sweets? Click here.

Ombré Meringue
prep time
25 Minute/s
cook time
45 Minute/s
total time
1 Hour/s 10 Minute/s
Serves 0Ingredients
  • 1 1/2 cups superfine sugar
  • 5 egg whites
  • food coloring
Instructions
  1. Line a rimmed baking sheet with parchment paper, pour in sugar and bake for about 5 minutes at 400 degrees F until the edges just begin to melt.
  2. Meanwhile, pour egg whites into the bowl of your stand mixer (make sure it’s clean) fitted with the whisk attachment. Whisk on low allowing bubbles to form, increase to high and continue whisking until stiff peaks form and you can turn the bowl upside down without the egg whites falling out.
  3. Remove the sugar from the oven and begin whisking again at high speed. Add one big spoonful at a time, ensuring that the whities come back to stiff peaks after each addition. Once all the sugar is added, continue to whisk for 5 - 7 minutes. You should be able to rub the mixture between your fingers and not feel any grit from the sugar. You know it’s ready to use when it forms a smooth shiny peak on the tip of your finger.
  4. Decrease oven temperature to 200 degrees F. Line baking sheet with parchment paper. Place a dab of meringue on four corners of pan and press paper on top to hold it down flat.
  5. To acheive the "kiss" - use a large circle pastry tip. Hold vertically above your parchment paper. Using a good amount of pressure, squeeze your pastry bag to create your base, then gradually release pressure as you pull directly upward.
  6. To achieve the ombre - Start with white kisses. Once you've piped about 12, add in 2-3 drops of food coloring. You can always add more but you can't take away, so start slowly. You can also add a single yellow drop if you want a peachier hue. Pipe another 12. Then add in more food coloring, repeating this process until you have 4 gradual but distinctly different colors.
  7. Bake at 200 degrees for 30-40 minutes until the kisses can easily be lifted off the parchment paper with bases in tact. Let cool completely. Meringues stored in an airtight container will keep for up to two weeks

And for a few more reasons to save your seat on the ombré bandwagon, check out this collection of inspiring goodies in various shades of pink and maybe a few other colors too.

21 Reasons Why Ombre is Still Cool
View Slideshow
21 Reasons Why Ombre is Still Cool
View Slideshow

[dotted]

See our full Valentine’s Day Inspiration here!

[dotted]

Photography: White Loft Studio | Design And Styling: Style Me Pretty Living | Recipe: Bakerella

Set Sail On The River Seine For This Parisian Wedding

It doesn’t get more romantic than Paris. That is until you include a lavish garden wedding, ethereal gray gown, and a clipper yacht down The River Seine. For their Paris destination wedding, Bradlee and Kevin pulled out all the stops. They decided to combine their two worlds by honoring their past and creating new memories for the present in the city of love. Claire Morris Photography was there to exquisitely capture the romance of the day. Visit the full gallery for a look at this wedding that’s equal parts elegant and awe-inspiring.


From the bride… We decided to get married in Paris because that is where I studied and have wonderful memories of my mother visiting me there. I wanted his family to establish new memories in Paris on their first trip there. We wanted to combine two worlds and do things a little differently than our peers.


The idea for the color palette was elegant and simple, just a bit ethereal, and adoring of the surroundings.  We complemented the garden with a sweet floral palette of white and blush peonies and roses, white hydrangeas, and greenery.  Gilles Pothier Floriste designed a gorgeous chuppah that was an extension of the garden, and minimalist bouquets for the spaces that needed them.


I wanted to pay homage to the people that wouldn’t be with us that day, and also make sure that the people that would be with us had an amazing time and adventure– something they would remember forever.  I wanted to focus on the experience, on what already existed, on the history, on the beauty of Paris and all the memories I (and we) have there… and simply fill in the details around that. The result was magical. 


Photography: Claire Morris | Flowers: Gilles Pothier Paris | Wedding Dress: JLM Couture | Cake: Ritz Paris | Reception: The Clipper | Shoes: Christian Louboutin | Rings: Michael & Sons, Reno, NV | Hair and Make up: Modern Beauties | Suit: Armani | shirt/pants/shoes/accessories: Hugo Boss | Planning and Design: Lucas Somoza | Ring Box: Allen Gleur

DIY Valentine’s Day Mini Bouquets

Flowers and Valentine’s Day just seem to go hand in hand, but the blooms below will surely get you a gold star from your loved one. They say good things come in small packages, and these itty bitty bouquets snapped up by Ruth Eileen prove that point in the prettiest of ways. Oh, and you can whip these up in no time. Promise.

Materials
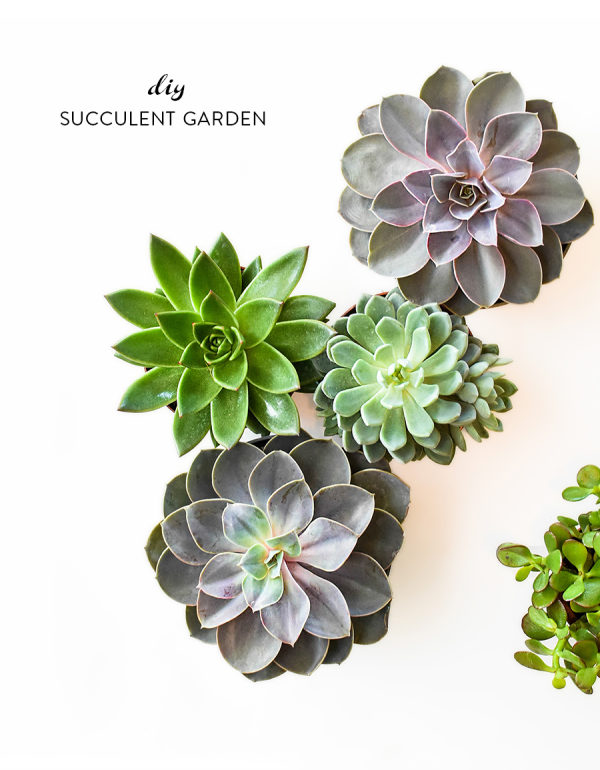
Fresh flowers with small to tiny blossoms (think spray roses and wax flowers)
Fresh greenery
Pink striped treat bags (we found them at Michaels)
White paper cording or string (we found it at Michaels)
White paper
Scissors
Rubber bands
Red heart confetti
Copper wire
Needle nose pliers
Hot glue gun
Hot glue sticks
Double sided tape

instructions

step-1Cut a 4” piece of copper wire with the wire cutters on the needle nose pliers.

step-2Cut a piece of paper to 2” x 1”. Fold paper in at ¾” to form the bottom of the envelope. Fold down the remaining paper over the envelope bottom to form the top flap. Fold under the corners of the top flap to make a point. Glue a heart confetti onto the point of the flap.

step-3Cut a piece of paper to 1” x ¾” and write a teeny tiny note to your Valentine. Tuck the note into the envelope and use a tiny piece of double sided tape to close the envelope. Glue the copper wire to the back of the envelope.

step-4Trim the flower and greenery stems to about 3” long and remove any excess leaves from the flower stems. Gather a small bundle of flowers, mixing 2 or 3 larger blossoms with a few sprigs of greenery and several stems of smaller flowers. Arrange them in your hand and tie the bundle with a rubber band. Tuck the envelope into the arrangement.

step-5Tuck the flower stems inside the treat bag. At the bottom of the bag, take one corner of the bag and wrap it around the bag to form more of a cone shape and glue in place. Tie the bag with a bit of paper cording in a bow. Repeat steps 1-5 to make as many mini bouquets as you like, then hand off to teachers, coworkers, and all the special someones in your life!

[dotted]

Photography: Ruth Eileen Photography | Design & Styling: SMP Living

Add a Touch of Spring Green to Your Home with this Simple DIY

When I hear things like easy to keep alive and will thrive during the winter then I know that’s the kind of house plant for me. Succulents are notorious for being easy to maintain and they’re totally en vogue so a little succulent garden DIY is just the thing for my fellow not-so-green thumbs. Follow these easy steps from Sage Market + Design along with Freebird Photography and get your plant on this Spring.

One of our favorite things to plants are succulents. Not only are they beautiful and unique and come in an large variety of colors and shapes but they are one of the easiest plants to care for. Succulents will thrive indoors during the winter, but really begin to show off in the summer so with spring quickly approaching it is the perfect time to plant a garden!

Materials

container
variety of different succulents
succulent potting soil
mister

instructions

step-1 Choose which container you would like to plant your garden in and from there you can figure out how many succulents you will need. Feel free to play around with the succulents in the bowl before you put the soil in to decide how you would like to place them.

step-2 Fill the container 3/4 of the way with special potting mix specifically for succulents and cacti. Choose a fast-draining soil that retains little moisture as succulents do not like wet roots.

step-3 
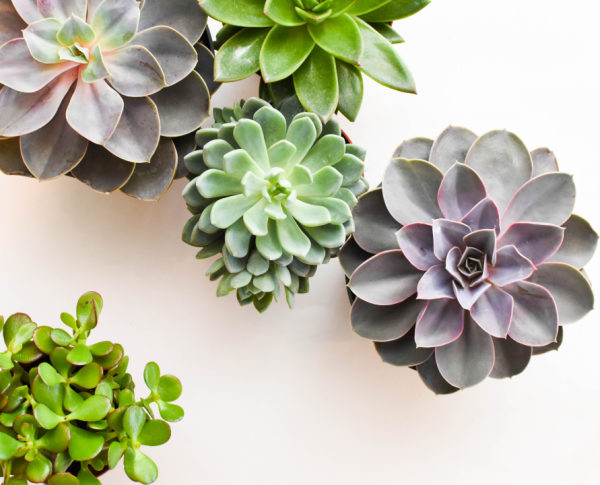
To plant start with your largest succulent. It doesn’t necessarily have to be placed directly in the middle of the bowl but it will offer you a focal point to build from. Remove the succulent from its plastic pot by turning it upside down in your hand and pulling off the pot, then gently breaking up the bottom to loosen the roots before setting it in the container. It can be helpful to plan your placement beforehand.

step-4 Continue by building out from this first planted succulent. Cascading succulents are best planted near the container’s edge. If you have succulents of similar colors place them in different areas around the container rather than concentrating them in one place. Also, you want the garden to have a lush, full look so fill in every gap.

step-5 Use a mister to lightly water. Succulents retain moisture so make sure not to overwater. The soil should feel bone-dry before watering again.

step-6 
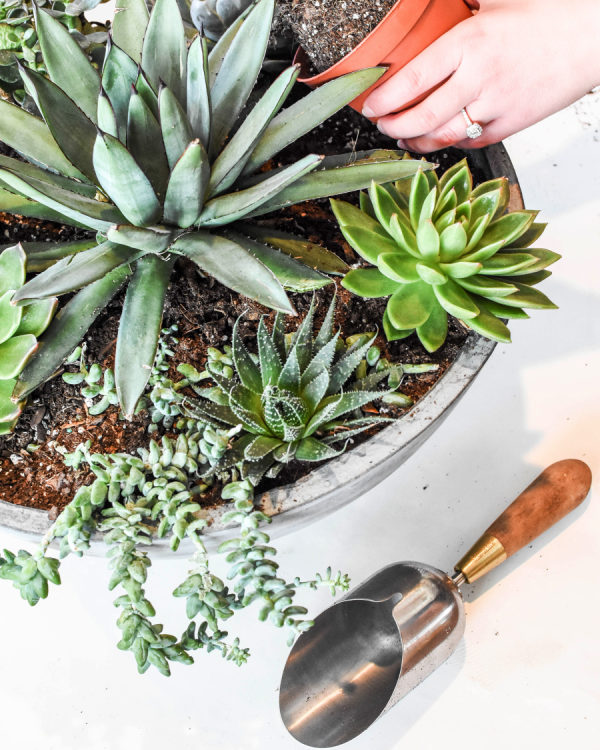
Enjoy your beautiful creation!

[dotted]

If you’re in a green kind of mood, check out this round-up of pretty, pretty plants for each and every style of decor. Are you a classic lover through and through? Or maybe boho has your heart? See just what plants are the perfect match…

Find Your Plant Soulmate
View Slideshow
Find Your Plant Soulmate
View Slideshow

Photography: Freebird Photography | Design: Sage Market + Design

Home 101: How to Style Bookshelves


One of the hottest topics these days is the #shelfie. We’re talking open shelving, decorative shelving, an isolated floating shelf, a bookcase all decorated with bits and bobbles of meaningful decor, pretty decor and, obviously, books.

This FEELS like a task that should be able to be accomplished in an afternoon… A little of this here! A little of that there! Some layering on this shelf, some layering on that shelf…. And at the end of all that effort, something feels off.

So what makes a good shelfie? We broke it down into a few core elements that compose a great shelf, and then adding a few extra tips and tricks at the bottom!

1. Collected Items

Some people collect pottery, others collect little bowls. Shelves are the PERFECT place to display your collections! After all, you want to display what you’ve worked so hard to assort, not hide it.

2. Horizontal Stack

One of the best tricks when it comes to displaying your books is to switch up the way they go on the shelf! This is especially useful when you’re working with books that are abnormally large. The “horizontal stack” allows for you to center up some books, place a nice vase or figurine on them and switch up how you read the spine.

3. Light Reflective Surfaces

When you’re dealing with a bookcase, chances are you’re dealing with a lot of soft, light-sucking surfaces. Giving a space “life” sometimes means giving it light, and in the case of styling, you’re shelf you’re definitely going to want to add a reflective surface or two. That could be a picture frame, small ornate mirror, metallic vase or anything that makes the light bounce around.

4. Storage

One of the best functionality elements of the shelf is sneaky storage. You can hide things in bowls, baskets bins, and cute cartons. Let your style serve a purpose for you too and you’ll be really happy with how well it looks AND how much it works for you.

5. Vertical Stacks

This is a given on a bookshelf as it is the standard way to display books, so think of this as your staple, anchored element. This is what the eye is trained to expect when approaching bookshelves, so keep this as a baseline standard peppered throughout your display.

6. Storied Items

Think of a shelf as a GREAT conversation starter and pepper in items with stories that you love and are great indicators of your personality. Don’t feel like this has to be exotic! It certainly can be, but stories of all location and price point are so fun here.

You could display a vase you got at a flea market while you were in Italy, or a vase you got for $. 50 and your bargain-hunting heart totally fluttered. You could display a camera that once belonged to your great, great grandfather, or the camera that was your first ever big-time investment… but is probably worth like $20 at most now. Whatever the story is, own it, and tell it!

7.Coordination Elements

This is where we get into layout. When you’re setting up your shelves thing of the whole unit as a scale — it requires balance. So if the top shelf has a squared basket on the left, consider putting your square bin on the right on the shelf right below it. Placement is by far the hardest part, but the best thing we can say here is to keep it balanced and to try out as many variations as your little heart desires until it feels *right,* and *right* typically means coordinating elements on different shelf levels.

8. Figurines

Since it is a bookshelf you’ll likely be dealing with a lot of absolute straight lines and squared up boxes. Figurines help to bring some more organic lines to the shelf-unit and help break up all those strict edges!

9. Natural Elements

A mixture of textures is important for balance, and being sure to add in natural textures is really important! Adding in natural textures is one of the quickest ways to bring in a “cozy” element to the shelves since you likely will not be fitting a textile :)

10. White Space

Many times the thing you’re missing most is the thing you least accounted for — blank space! You need to give your eye a place to rest. Everything doesn’t always need to touch and sequentially work perfectly together. A great collection of displayable items takes time! So you can breathe easy here knowing that your shelves won’t be perfect in a day, and in the meantime utilize that white space to your favor and let your eyes rest.

A Few Other Tips

-Be intentional about how you organize the books: You can organize by genre, size, color or author! You can seriously make a huge statement by choosing any of these options.

-Mix The stack: The traditional way to fill the shelves is to neatly stack your books vertically on the shelf one by one across the length. Mix it up! Add in some horizontal stacks, make smaller vertical stacks and every once in a while a tilted book looks a little chic.

-Pepper in other decor: Once you’ve mixed up how you stack your books, you now have new platforms for highlighting other elements. For example, a fun, collected figurine looks at home on top of a horizontal stack of books. A small, sturdy potted plant acts as a good bookend to hold up a vertical stack, and if you’ve got an area that needs attention, framed photos or peices of art always make a set of shelves look good!

curve ball

Now that you know the basic cadence of styling shelves, here’s where we really confuse you. KNOW the rules, then BREAK the rules — intentionally. A few of our favorite rule-breakers we’ve seen:

-Everything is filled with books. There are no figurines, greenery or vases. It’s a sea of books. It’s beautiful

-A sea of books TURNED AROUND so that you see the page side instead of the spine. Warning if you try to execute this one — it will be very difficult to find your books. It looked cool, but we can’t imagine it was easy to locate The Hobbit.

– Lots of figurines, a handful of books, some baskets, barely anything on the shelves. Sparce, sleek and ultra chic.

At the end of the day, the shelf is there to show off you and you’re style. So whatever YOU do is right for you. Happy decorating!

DIY Chocolate Wax Seals

As a follow-up to the super cute Galentine’s party, we wanted to share a yummy DIY perfect for sealing those Valentine’s treats and gifts. These Gold Chocolate Wax Seals crafted by Lauryn Prattes Styling And Events with the prettiest custom seals from Laura Hooper are a welcome addition to any pastry. And edible gold? Count us in! For the full party gallery photographed by Abby Jiu, click here.

Materials

Wax Seal
1 cup of Chocolate Chips
Parchment Paper
Gold Luster Dust

instructions

step-1Using a double boiler (or large pot and a metal bowl) place water in the bottom pot so it is just 1/2 inch below the top pan. Place 1 cup of chocolate chips in the top pan and place over low-medium heat. Stir constantly until chocolate chips melt. Water should not come to a boil. Remove from heat and let cool about 3 minutes.

step-2 Place wax stamper on ice in a small glass to allow it to get cold. Use a small spoon to place dime size dollop of chocolate onto a sheet of parchment paper. Remove the cold wax stamper from the ice, wipe dry and stamp down onto the chocolate, press down so the chocolate oozes around the side, forming the “seal” look. Leave the stamper in place for 3-5 seconds to allow chocolate to cool and remove. Repeat, placing the stamper on ice between seals.

step-3 Use gold luster dust to paint seals gold if desired. Place in refrigerator to chill prior to using. To adhere to pastry simply use a small dollop of melted chocolate or honey.

[dotted]

Photography: Abby Jiu Photography | Event Design: Lauryn Prattes Styling And Events | Wax Seal : Laura Hooper Calligraphy | Desserts: Buttercream Bakeshop | Venue: Winifred Paper

Romantic Estate Inspiration Every Princess Bride Will Fawn Over

An estate fit for a princess, an enchanted garden, a lace dress and flower magic from Hanaki Floral Design – this stunning styled shoot from Jacqueline Rae Weddings is nothing short of a fairytale. It perfectly combines traditional elegance with romantic details, leaving no detail left unturned. Head on over to the full gallery captured beautifully by Kristyn Harder Photography to get seriously inspired for your big day.

From the Photographer… Built in 1911, Hycroft Manor is a breathtaking mansion that was once the center of Vancouver’s social scene. It was known for its parties, which were attended by the city’s elite. In addition to its rich history, the buildings architecture and surrounding gardens are a sight to be seen. This is truly a magical place, which is why it’s still a sought-after venue for weddings and events today. As a wedding photographer, I believe there are two keys to a beautiful wedding portrait. A couple whose love shines brightly, and a picturesque setting surrounding them in their bliss. Add in the stunning details such as florals, a classic car and designer wedding gowns, and even more magic is made.

This inspiration shoot at Hycroft Manor came together with the contribution of some of the best vendors Western Canada has to offer, and a crazy-in-love couple who was preparing for their own wedding day just one week later. During a trip to Vancouver, I visited Hycroft Manor and was blown away by how beautiful the mansion and the grounds were. The architecture is classic and detailed, with the view of the front and the grand back staircase stealing the show for me.

In one corner I found the Heritage garden, blooming with assorted flowers, falling vines, and adorned with sculptures. The view terrace was the perfect spot for a reception to take place, and the Juliet balcony would be ideal for couple’s portraits as the sun set. I knew I had to photograph here, and the words classic, elegant and heartfelt inspired what was to come. I met with Jacqueline Rae, a wedding planner based out of Calgary, who is inspired by French-European Design and classic details. She was the perfect person to bring my vision to life, and together we planned our trip to Vancouver a few months later.

From the Designer… Architecture plays a large role in our classic-focused designs and the Hycroft Manor provided a breathtaking aesthetic and history to build upon and complement. Combined with a curated team of valuing connection and utter-romance, our inspiration shoot came to life in the best-possible way. Emilee and Scott are two of the sweetest people we have ever had the pleasure of working with. They were so in love and looking forward to their own wedding day only a week later. We made the decision at the start to include a real couple as part of the project, since we valued real emotion, connection and joy to come through in photographs. Not only were Emilee and Scott easy to photograph because of their connection, but they made beautiful models too. Hanaki Floral Design created the most beautiful floral pieces, including the show-stopping bridal bouquet and the balcony adornment that provided the most beautiful backdrop for our bride and groom. A blend of centerpieces filled the tablescape with mercury glass compotes, added dimension and combined with delicate blooms and vines, added an organic and Ikebana approach to a classic design. Quaint place setting bouquets wrapped in cream-silk ribbon sat atop the guest menu and place cards. A custom car wreath was designed alongside a hand-calligraphed fabric banner from Debbie Wong Designs

Debbie created the most-romantic stationery and calligraphy suite including linen menus and hand-calligraphed silk-ribbon placecards that sat on top of the delicate place settings. Paper details included a hand-drawn sketch of the Hycroft venue columns on fine vellum with a calligraphy invite suite underneath. Complementing the paper goods was hand-calligraphy love notes to the couple. Stesha Ho is a talented couture dress designer based out of Vancouver who creates custom gowns for her brides. She contributed two stunning gowns incorporating only the finest European lace and silk as well as hand-sewn beading which featured intricate, feminine details. Our Menswear included a classic black tux with a shawl lapel by Black and Lee and was tailored to our tall Groom. Joanna Bisley Designs provided the exquisite bridal jewelry including a heirloom hair-pin with pearls and delicate jewels and delicate clear crystal earrings with light ivory pearl navettes in a gold setting. The tablescape and event rentals were provided by Pedersen’s Event Rentals and featured beautifully textured White Panama Linen, Bone Coupe Plates, soft Blush Napkins, and Gold Nova chairs which allowed clear sight lines through the cane-back glass. A champagne coupe tower placed on a Shant blush linen added to the classic details of the event. Our classic car provided by Ritz Limousine was a cream 1939 Cadillac Stretch Limousine with suede interiors and peekaboo back windows adding charm and elegance to sweep our couple away.

Photographer: Kristyn Harder Photography | Florist: Hanaki Floral Design | Wedding Gown: Stesha Ho | Stationery: Debbie Wong Design | Makeup and Hair: Alisha Hopps | Car Rental: Ritz Limousines | Wedding Venue: Hycroft Manor | Accessories: Joanna Bisley Designs | Menswear: Black & Lee | Planning: Jacqueline Rae Weddings | Rentals: Pedersen's rentals | Veil: Sara Gabriel

DIY Paper Covered Boxes for Storing or Gifting

Whether you’re working away on presents to sneak under the Christmas tree, or looking to gussy up gift boxes for your bridesmaids and beyond, this video tutorial is one to bookmark. In just a few easy steps, you can take your gifting game to the next level with a box that certainly won’t be tossed away. Thanks to Elysium Productions for filming the step-by-step below!

[iframe https://www.youtube.com/embed/RcNXLPqHYVU 600 355]

[dotted]

Materials

Bowl
Sponge
Box
Ruler
Paint
Scissors
Spray Adhesive
Paper

instructions

step-1 Place some paint inside the bowl. Paint inside the box and lid.

step-2 Measure the box and lid. Width + 2x Height + 1 inch. Transfer measurements onto paper. Then cut a square piece for each of them.

step-3 Center the box on the paper, then fold all four sides up. Create creases at each corner. Cut slits at each four corners, stopping at the box perimeter. Spray adhesive onto the paper and place the box in the center. Cut the paper to match the shape. Spray adhesive on all four sides and fold the paper up against the box.

step-4 Repeat the same steps for the lid. Voilà!

[dotted]

Film: Elysium Productions | DIY: Style Me Pretty

[dotted]

MORE DIYS THIS WAY!

These Vendors are members of our Little Black Book.
For membership information, click here
A Galentine’s Soiree + Valentine’s Printables!

Gal + Valentine’s = Galentine’s! Clever, right? This party inspiration crafted by Lauryn Prattes Styling And EventsHolly Chapple Flowers, and Abby Jiu Photography is all about celebrating friendships this Valentine’s. Feasting on sweet treats, crafting love day notes with stationery by Winifred Paper + calligraphy by Laura Hooper and sipping bubbly sounds like a Vday spent well. Click here for more.

[dotted]

Valentine’s Day Printables

[dotted]

Cootie Catchers
Envelope Liners – Red Hearts, Be Mine, Red Dots, Red Stripes, Pink Stripes
Pop-Up Valentine Card

Host a Galentine’s Soiree for your girlfriends this year to celebrate your friendships. We designed our party around a playful and fun color palette of cherry red, blush pink, fuchsia, white and gold.

Sweet treats and desserts are not only the perfect bites for the party, but also double as Valentines Gifts. Using an edible marker you can write any message onto a macaroon shell, and package them in a pink tissue paper cracker for an extra special surprise. Another treat is a unique spin on Italian Rainbow Cookies – instead of the traditional red, green and white we made them more Valentines appropriate with pink ombre layers. Chocolate seals made using a wax stamper from Laura Hooper Calligraphy were dusted gold and “glued” to the top layer using melted chocolate. (See tutorial below)

Hand painted watercolor cookie hearts, X’s and O’s make for a Valentines surprise. We packages ours in vellum envelopes, tied with red and white twine and sealed with wax. But one of our favorite desserts was the adorable heart shaped S’mores. Why have white marshmallows when they can be pink marbled? Cut marshmallows out with heart cookie cutters and layer with white chocolate and a chocolate cookie – nothing says I Love You S’more.

The table for the party was set with acrylic trays, gold vinyl decals printed by Winifred Paper studio featuring calligraphy from Laura Hooper. The trays were then filled with all the paper, tape and crafting supplies needed for an afternoon of Valentine’s making delight. And one of our favorite Valentines is the adorable Cootie Catcher from Winifred Paper studio, package with a little crinkle paper and a pink box and it’s complete.

Pink champagne glasses and heart and arrow stir sticks made by Lauryn Prattes Styling and Events were the perfect touch for the table. Above the table we strung gold heart garland while greenery and flowers from Holly Chapple accented the chandelier. More beautiful blooms in shades of pink and red finished off the table.

Check out Laura Hooper’s Etsy shop for some of the details we used in the shoot available for purchase – like the heart coasters, cake topper and Valentine’s day prints.

Photography: Abby Jiu Photography | Event Design: Lauryn Prattes Styling and Events | Flowers: Holly Heider Chapple Flowers LTD | Stationary: Winifred Paper | Calligraphy: Laura Hooper Calligraphy | Venue: Winifred Paper | Bar Cart/Champagne Bucket/Gold Flatware/Cake Server/Cake Plate: Mintwood Home | Chalk Art/Heart Coasters/Cake Topper/S'more Bags/Art Prints/Wax : Laura Hooper Calligraphy | Desserts: Buttercream Bakeshop | Heart Garland: Pop Of Happy | Large Balloons: Stephanie Shives Studio